insurance
Austin Hail Storm Roof Claim Process: A Step-by-Step Guide
Nighthawk Crew · Jun 1, 2025
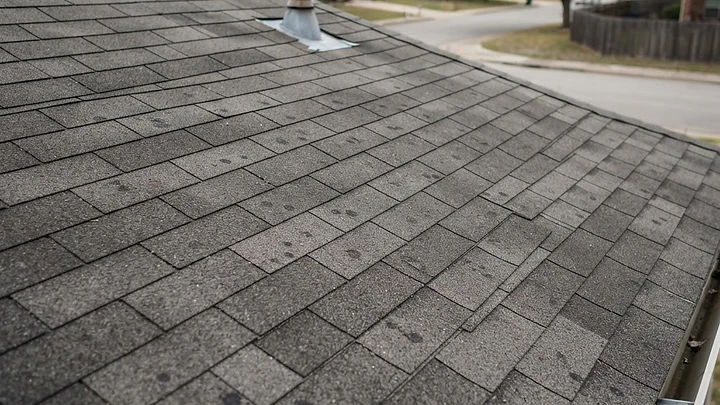
If you live in Austin, hail isn't a question of if - it's a question of when. Central Texas sits squarely in a hail corridor that produces damaging storms every spring and fall. When a hailstorm hits your neighborhood, knowing what to do next can be the difference between a smooth insurance claim and a denied one.
This guide walks through the entire process, step by step, so you know exactly what to expect.
Step 1: Document the Damage Immediately
After the storm passes and it's safe to go outside, start documenting. Take photos of:
- Granules in your gutters and at the base of downspouts
- Dented metal surfaces - vent caps, flashing, mailbox, AC condenser fins
- Any visible damage to shingles from the ground (cracked, lifted, or missing tabs)
- Interior stains on ceilings or walls, if any
Don't climb on the roof yourself - that's what we're for. But ground-level photos and documentation are valuable evidence for your claim.
Step 2: Call a Roofing Contractor Before the Adjuster
This is the step most homeowners skip, and it's the one that costs them the most.
When you call your insurance company first, they send an adjuster who may spend 15 minutes on your roof and write a report that says "no damage found." But hail damage isn't always visible from a quick walk - it shows up as bruises in the shingle mat that you can only see up close.
A roofing contractor who works with insurance claims will:
- Fly the roof with a drone and capture high-resolution photos of every slope
- Identify hail strikes, granule loss, and dented metal
- Provide a written damage report with dated photos
- Meet your adjuster on site to walk the roof together
This is the documentation that gets claims approved.
Step 3: File the Claim
Call your insurance company's claims line and report the hail damage. Have your policy number ready, and tell them the date of the storm. They'll assign an adjuster and schedule an inspection.
Important: Tell them you have a roofing contractor who will be present for the inspection. You have the right to have your contractor there, and it makes a difference.
Step 4: Meet the Adjuster on Site
When the adjuster arrives, your contractor should be there too. The adjuster will inspect the roof, and your contractor can point out:
- Hail bruises that aren't obvious from a quick walk
- Dented vent flashing and pipe boots (clear impact evidence)
- Granule loss patterns that match hail impact
- Damage to specific slopes (hail rarely hits evenly across all roof planes)
Having a contractor present ensures the adjuster sees the full picture, not just what's visible from the ridge.
Step 5: Review the Scope and Approval
Once the adjuster completes their inspection, the insurance company will send you a scope of work and an estimate. Review this carefully - it should cover:
- Full roof tear-off and replacement (if damage is widespread)
- New underlayment, flashing, and pipe boots
- Decking replacement if there's rot
- Disposal of old materials
If the scope is missing items or the estimate seems low, your contractor can request a supplement. This is a standard part of the process and doesn't affect your claim negatively.
Step 6: Schedule the Work
Once the claim is approved and the scope is finalized, schedule the work with your contractor. You pay your deductible directly to the contractor, and the insurance company covers the rest.
Never let a contractor offer to "waive" or "cover" your deductible - that's insurance fraud in Texas, and any contractor who offers it is cutting corners somewhere else.
Step 7: Final Inspection and Payment
After the roof is complete, your contractor will do a final inspection and provide documentation for the insurance company. The insurance company may send an adjuster to verify the work was completed, and then they'll release the final payment (called the depreciation check).
Tips for Austin Homeowners
- File quickly. Most policies require claims within one year of the storm, but the sooner you file, the easier it is to prove the damage was storm-related.
- Keep all documentation. Photos, adjuster reports, contractor estimates, and receipts - keep everything in one folder.
- Don't delay repairs. If your roof is damaged, a tarp can buy you time, but insurance may not cover additional damage if you wait too long to fix the original problem.
- Consider Class 4 shingles. When replacing your roof, ask about Class 4 impact-rated shingles. They can lower your insurance premium and handle the next hailstorm without a claim.
Need Help with Your Hail Claim?
We've walked hundreds of Austin homeowners through the hail claim process. We document the damage with drone photos, meet your adjuster on site, and build the scope to match the approved loss. You pay your deductible and nothing more.
Call us for a free inspection - we'll tell you straight whether you have damage worth claiming.